Thursday, March 1, 2012

March Dessert


Cook's Illustrated

THE ULTIMATE FLOURLESS CHOCOLATE CAKE

Serves 12 to 16.   Published March 1, 1998.  

WHY THIS RECIPE WORKS:

For our ultimate flourless chocolate cake recipe, we wanted a texture somewhere between a substantial marquise au chocolat—that dense, buttery, and just slightly aerated chocolate mousse with a characteristic dry but creamy texture—and a heavy New York-style cheesecake, which requires the mouth to work for just a second before the stuff melts and dissolves with sublime flavor. To achieve this texture in our flourless chocolate cake recipe, we beat whole eggs into a foam and gently folded in bittersweet or semisweet chocolate and strong coffee or liqueur. Then we baked our cake in a water bath at a low temperature, and removed the cake from the oven when it reached 140 degrees.
Even though the cake may not look done, pull it from the oven when an instant-read thermometer registers 140 degrees. (Make sure not to let tip of thermometer hit the bottom of the pan.) It will continue to firm up as it cools. If you use a 9-inch springform pan instead of the preferred 8-inch, reduce the baking time to 18 to 20 minutes.

INGREDIENTS

  • 8large eggs , cold
  • 1pound bittersweet chocolate or semisweet chocolate, coarsely chopped
  • 1/2pound unsalted butter (2 sticks), cut into 1/2-inch chunks
  • 1/4cup strong coffee or liqueur (optional)
  • Confectioners' sugar or cocoa powder for decoration

INSTRUCTIONS

  1. 1. Adjust oven rack to lower middle position and heat oven to 325 degrees. Line bottom of 8-inch springform pan with parchment and grease pan sides. Cover pan underneath and along sides with sheet of heavy-duty foil and set in large roasting pan. Bring kettle of water to boil.
  2. 2. Beat eggs with hand-held mixer at high speed until volume doubles to approximately 1 quart, about 5 minutes. Alternately, beat in bowl of electric mixer fitted with wire whip attachment at medium speed (speed 6 on a KitchenAid) to achieve same result, about 5 minutes.
  3. 3. Meanwhile, melt chocolate and butter (adding coffee or liqueur, if using) in large heat-proof bowl set over pan of almost simmering water, until smooth and very warm (about 115 degrees on an instant-read thermometer), stirring once or twice. (For the microwave, melt chocolate and butter together at 50 percent power until smooth and warm, 4 to 6 minutes, stirring once or twice.) Fold 1/3 of egg foam into chocolate mixture using large rubber spatula until only a few streaks of egg are visible; fold in half of remaining foam, then last of remaining foam, until mixture is totally homogenous.
  4. 4. Scrape batter into prepared springform pan and smooth surface with rubber spatula. Set roasting pan on oven rack and pour enough boiling water to come about halfway up side of springform pan. Bake until cake has risen slightly, edges are just beginning to set, a thin glazed crust (like a brownie) has formed on surface, and an instant read thermometer inserted halfway through center of cake registers 140 degrees, 22 to 25 minutes. Remove cake pan from water bath and set on wire rack; cool to room temperature. Cover and refrigerate overnight to mellow (can be covered and refrigerated for up to 4 days).
  5. 5. About 30 minutes before serving, remove springform pan sides, invert cake on sheet of waxed paper, peel off parchment pan liner, and turn cake right side up on serving platter. Sieve light sprinkling of Confectioners’ sugar or unsweetened cocoa powder over cake to decorate, if desired.

TECHNIQUE

Propping the Mixer
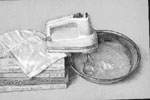
By setting the hand held mixer on a crock, pile of books, or some other prop, you can avoid having to hold the mixer for five minutes as you are beating the eggs to a froth.
America's Test Kitchen
America’s Test Kitchen is a 2,500-square-foot kitchen located just outside of Boston. It is the home of Cook’s Country and Cook’s Illustrated magazines and is the workday destination for more than three dozen test cooks, editors, and cookware specialists. Our mission is to test recipes until we understand how and why they work and arrive at the best version. We also test kitchen equipment and supermarket ingredients in search of brands that offer the best value and performance. You can watch us work by tuning in to America’s Test Kitchen (www.americastestkitchen.com) on public television.

March 2012 Menu


Even though we are heading towards Spring, I still like the idea of a good braised meal. March can be a month where we are teased by the flowers peeking through the hard ground but still have many days to go before those in the colder sections of the country start to see the big warm-up. That’s why we wait till May to head back to Connecticut. Even here in AZ I can appreciate and love the smells of a good braised dish in March.
I have chosen a braised pork ragu for this month. It will be served over pasta (I will buy my pasta), but you can check out the website for this recipe and try his homemade pasta recipe. I will probably choose a wide pappardelle noodle.

This should be served with a simple tossed salad of your choice and of course a great loaf of warm Italian bread.

Wine - any nice Italian red. 


For dessert, the chocolate lover in me chose a flourless chocolate cake. This can be made a few days in advance and just refrigerated.


The comments and pictures below are from the website:


http://www.macheesmo.com/2010/09/pork-ragu-plus-pasta-night/


Pork Ragu

Yield: Serves 8-10

Ingredients:

2.5 pounds boneless pork butt
8 ounces bacon or pancetta
1 large carrot, diced
2 stalks celery, diced
1 small onion, diced
3 cloves garlic, minced
1 28 ounce can stewed tomatoes
2 Cups water
1 cup white wine (you could use red, but I used white for this and really liked it)
2 bay leaves
1 Teaspoon red pepper flakes (optional)
1/4 Teaspoon cinnamon (trust me)
Salt and pepper
Basic Pasta Recipe (From How to Cook Everything)
2 Cups flour (all-purpose flour, Semolina flour, etc.)
3 large egg yolks
2 large eggs
1/2 Teaspoon salt (or 1 Teaspoon kosher salt)
Helpful Equipment:
Pasta Maker (Attachment or the stand-alone variety)


The Ragu

I don’t make a lot of slow-cooked meat sauces here on Macheesmo but sometimes there’s nothing better. The thing that I don’t normally do is just toss a bunch of ground meat in with tomato sauce and call it good. We can do better.
So much better.
This is one of those recipes of love that requires a bit of time but is very flexible ingredient-wise and very low maintenance actually.
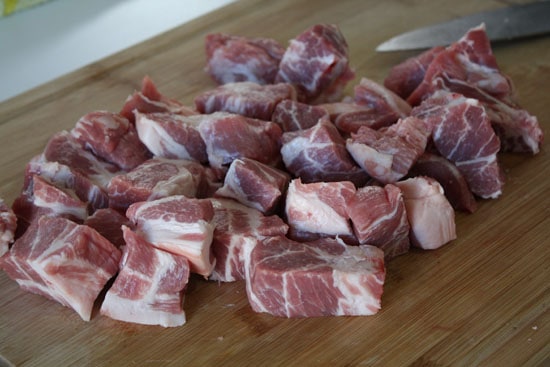
Start with a boneless pork butt and chop it into about 1 inch chunks. I like leaving on most of the fat because it melts down as it simmer and makes the sauce really flavorful. You could trim it off though if it bothers you.
pork butt
You could trim off some of that fat... but WHY?
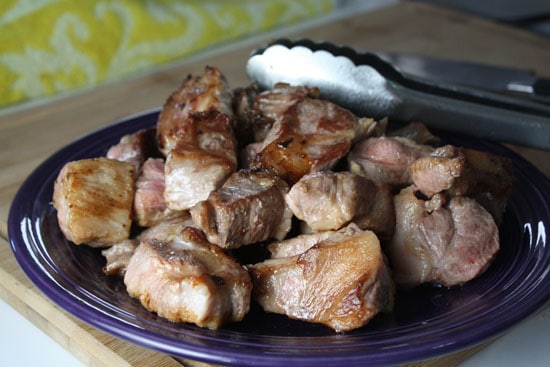
Get a large heavy pot (cast iron works great if you have one but you can use anything really) going over high heat and once it’s hot, add your pork pieces in batches. Brown them evenly on each side. Don’t be afraid if a little smoke happens.
This is probably the most important part of the recipe. Making sure all the pork is nice and browned is pretty key. As the pieces brown, pull them out onto a plate until they are all done.
browned meat
The start of something wonderful.
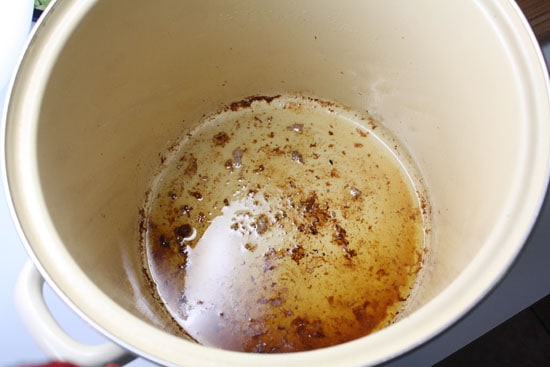
This is important because the meat caramelizes a bit but also because you end up with what some people consider garbage but I consider to be liquid deliciousness.
pot
Liquid flavor.
You would have to be insane to throw this stuff away.
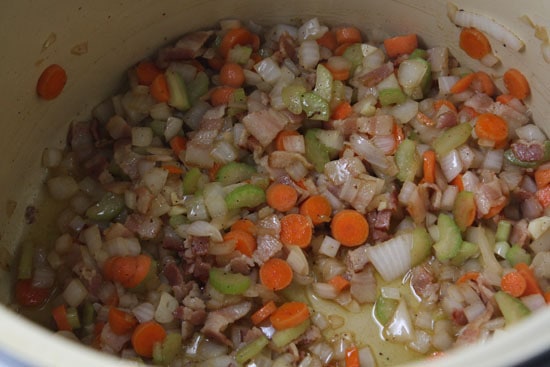
Instead what you want to do is add some bacon to it and let it brown over medium-high heat and then add the carrots, onions, celery, and garlic and a pinch of salt.
This will start to smell really really good.
other stuff
Bacon and veggies...
Once the veggies are soft, add the wine and it will hiss and steam. Use the wine to scrape up any little bits of food stuck to the bottom.
Then add all your pork pieces back into the pot along with the stewed tomatoes, water, and spices.
Simmer this, covered, for about 3 hours.
We’re not done.
Then simmer it for about 2 more hours with the lid off to get the liquid reducing.
Next, take out a piece of pork and try to pull it apart. If it doesn’t fall apart then cook it longer. It’s almost impossible to overcook this so don’t worry about that. Once the pork is tender just kind of mush up the pieces so they shred apart some.
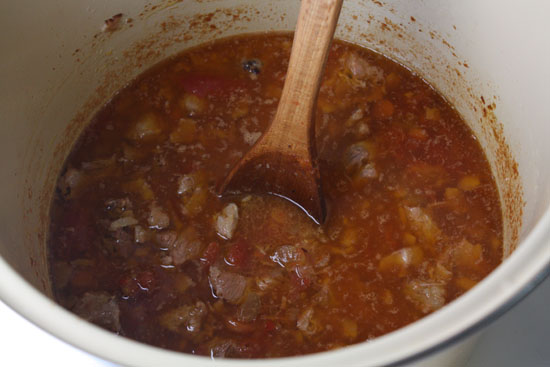
This was mine after about 3 hours of simmering covered.
ragu